Red Velvet Cake Bites
As soon as I pulled out the cake tester, I thought, “Well, I’ve been wanting to make red velvet cake bites for a while.” I was actually proud of myself for turning an overdone cake into a positive. These little cuties are made with my favorite red velvet cupcake recipe and are absolutely delicious!
Of all the ways to fix a dry cake situation, these are my favorite. Another good reason is because you more than likely had some frosting either made or bought to frost the original cake. Perfect! Because that’s the glue that holds cake pops together! You’ll notice on the cupcake recipe that there’s two frosting options, and both of them are fabulous in these cake bites!
If you love baking as much as I do, then you might have some candy melts spooking around your cabinets. And if not, go ahead and grab a couple bags (or use white chocolate!) along with some treat sticks. It took me a little more than 12 oz of candy melts to coat all 24 cake pops.
How much frosting do I need?
You’ll notice that in the recipe card, I don’t give an exact measurement for the frosting. That’s because each time I make these red velvet cake pops, (or any cake pops!) I use a different amount. It’s totally dependent on the moisture that’s already in the cake crumbs. Start with a tablespoon or two and work your way up from there.

You know you’ve reached the perfect texture when you can pack the cake/frosting mixture into a ball and roll it like cookie dough between your palms without it falling apart. Some small breakage is okay, so long as it easily packs into place and stays put from there.
After you’ve rolled the cake balls and they’re smooth, chill them in the fridge for at least 2 hours. You can also freeze them. The whole goal of the packing, rolling and chilling is that the cake bites don’t fall apart when they’re being dipped in warm coating.
Coats of many colors.
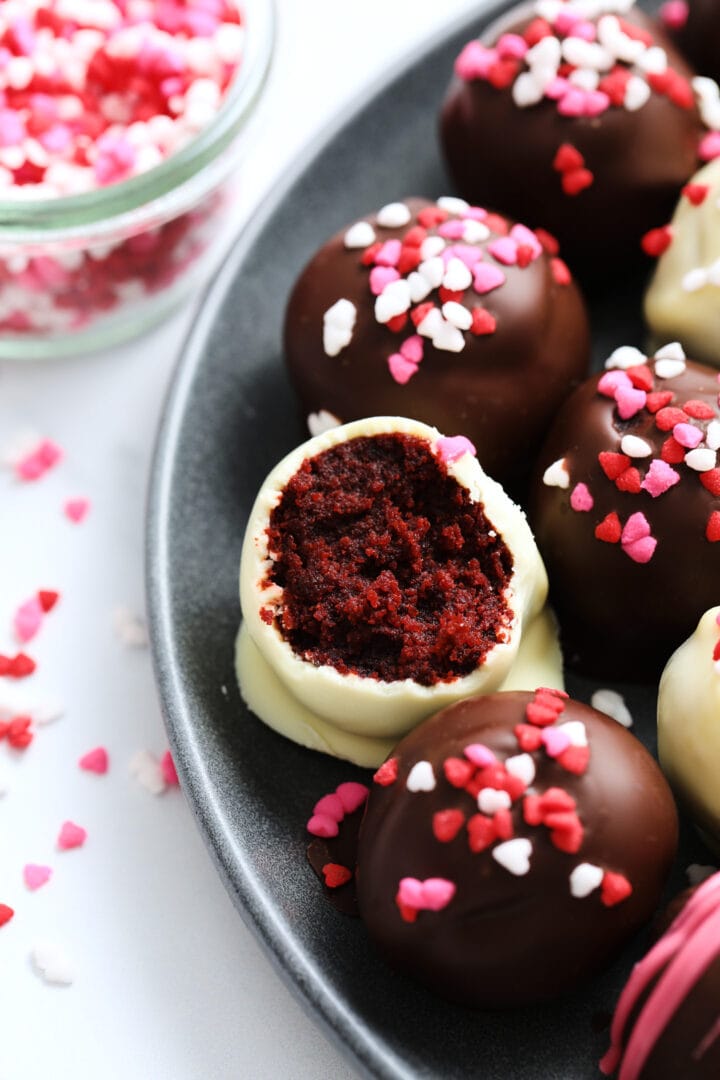
Speaking of the coating, I’m probably in the minority that thinks of those candy melts as a minefield. It never fails. Whenever I melt them with a double boiler, they overheat and seize and I have to spend all my time babying it with a spoon until it cools down enough to drizzle/coat properly. Sheesh. To keep that from happening, I have the best luck with the microwave on 50% power in 15-30 second intervals. Start out with a couple 30 second ones, stirring in between, then use a 15 or two as needed. Again, if they do overheat and seize up, just stir them occasionally until they cool down. It’ll be okay.

When you’re ready to coat the cake bites, line a baking sheet with some parchment paper and have it ready for the wet cake bites. I love having a dedicated dipping tool set to work with, but a fork works well, too. Be gentle with each cake bite when you dunk them, you don’t want to break any crumbs off into the chocolate.
Print
Red Velvet Cake Pops
- Prep Time: 5 minutes
- Chilling Time: 2 hours
- Cook Time: 30 minutes
- Total Time: 2 hours + 35 minutes
- Yield: 24 cake pops 1x
- Category: Dessert, Bite Size
- Method: No Bake
- Cuisine: American
Description
Cake too dry? These cake bites have your back.
Ingredients
- 1 recipe scratch red velvet cupcakes, or prepared & cooled red velvet box mix
- 1–2 TB cream cheese frosting
- 12 oz candy coating wafers or white chocolate
- sprinkles for decoration
Instructions
- Crumble the cake into the bowl of a stand mixer and use the paddle attachment to mix on low speed to form even crumbs. Stop the mixer and add 2 TB of cream cheese frosting to start. Beat on low speed until all the frosting is incorporated.
- Test to see if the cake mixture has reached the right consistency by packing it between your palms/fingers. If it packs well and you are able to roll it into a ball without it breaking, then stop adding frosting. But if it crumbles easily, continue adding frosting by tablespoon until you reach the right consistency.
- Using a small cookie scoop (1 TB size), portion out the cake bites, roll them until they are smooth and place on a parchment paper lined baking sheet. Chill for 2 hours. Once the cake bites have chilled, melt the candy coating/white chocolate in a microwave safe bowl. Start by 30 second intervals at 50% power, stirring well between each one until all the wafers have melted and are smooth.
- Remove the sheet of cake bites from the fridge and begin coating them in the chocolate. Use a fork or dedicated dipping tool to gently submerge each cake bite fully into the chocolate/coating. Gently tap the fork/tool on the edge of the bowl to shake the excess coating from each cake bite before transferring them to the lined baking sheet. Add the sprinkles before the chocolate sets. Repeat for the remaining cake bites and allow the coating to set.
Nutrition
- Serving Size: 1 cake pop
- Calories: 297
- Sugar: 13.4 g
- Sodium: 171.4 mg
- Fat: 14.2 g
- Saturated Fat: 6.8 g
- Trans Fat: 0 g
- Carbohydrates: 38.9 g
- Fiber: 0.8 g
- Protein: 3.8 g
- Cholesterol: 32 mg


