Yellow Birthday Cake
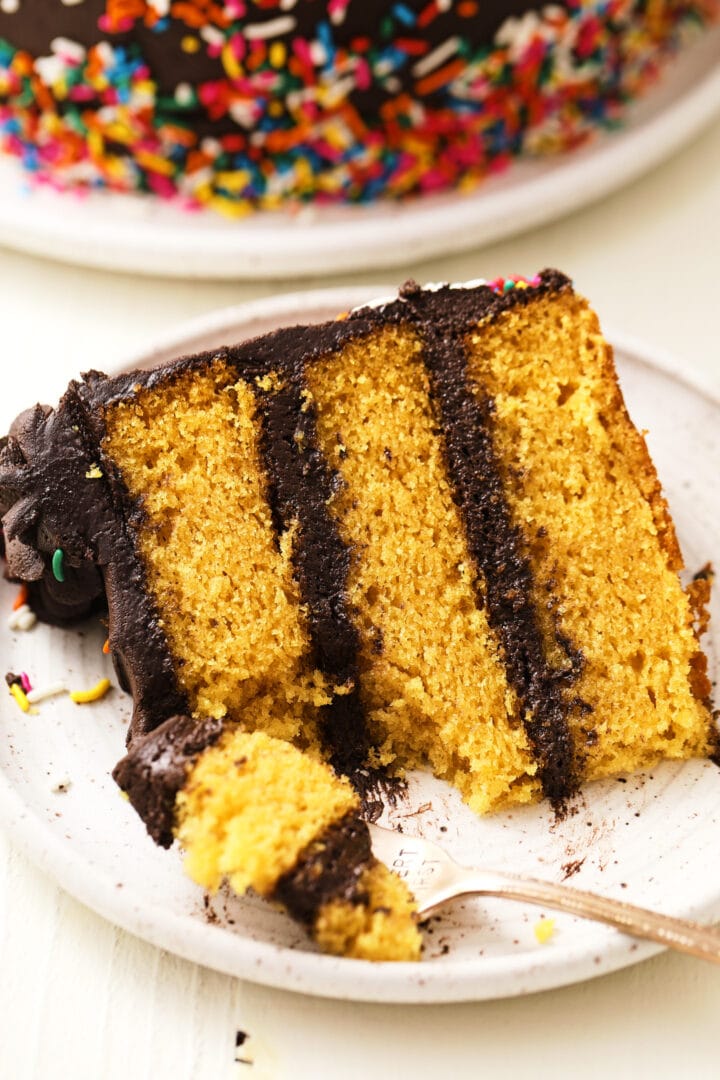
I used to really dig chocolate cake. Don’t get me wrong, I still do – but there’s something about this classic yellow birthday cake that’s extra special. The buttery rich, tender cake layers and silky smooth chocolate buttercream are a match made in heaven. It’s a classic for a reason!

Using both butter and oil makes this cake flavorful and soft. The butter adds richness and the oil keeps it sturdy enough to handle the thick chocolate buttercream. Be sure to use a good quality butter with plenty of butterfat – 84% plus – since the butter in this cake recipe is a main flavor component.
Vanilla
Other than the butter, you’ll also want to use a nice vanilla. I know it’s pricey, but again, the vanilla is the main flavoring in this yellow birthday cake. Get as close to pure vanilla extract as you possibly can. I use Nielsen Massey, which you can sometimes find on sale at Amazon. But in the grocery store, you’d be in a good spot just by using McCormick’s pure vanilla.
Brown Sugar
The first few tests I ran did not include brown sugar. They came out nice, but I was still missing a little more flavor to the “buttery vanilla” end. I didn’t want to add more extract and throw off the moisture balance of the batter, and adding extra butter would cause the same issue.
Finally, I ended up swapping a third of the plain sugar measurement with packed brown sugar. The result? Tender, soft and moist cake with the perfect flavor. It wasn’t too huge of a difference, my taste testers said, “The second one is just better. The first is good, but whatever you did to the last one makes it really good.”
So that solved that issue.
After baking
This is going to sound super weird, but just hang with me for a minute. Give the cake layers about 5 minutes to cool. Just long enough so that they settle down and flatten a bit. After 5-7 minutes, carefully flip them out of the pans and wrap them in plastic wrap when they’re still hot. Yes. Still HOT. As soon as you have all 3 layers wrapped, stick them in the freezer for 3 1/2 hours. Long enough until they’re very cold and are beginning to harden and freeze on the edges. The time might be different for you.
This locks in ALL the moisture and keeps it in the cakes. I learned this only just recently, but I’m so glad I did. Apparently a lot of wedding cake bakers use this trick. If you bake the cake early enough in the day, you could definitely frost and serve it as dessert after dinner.
Chocolate buttercream
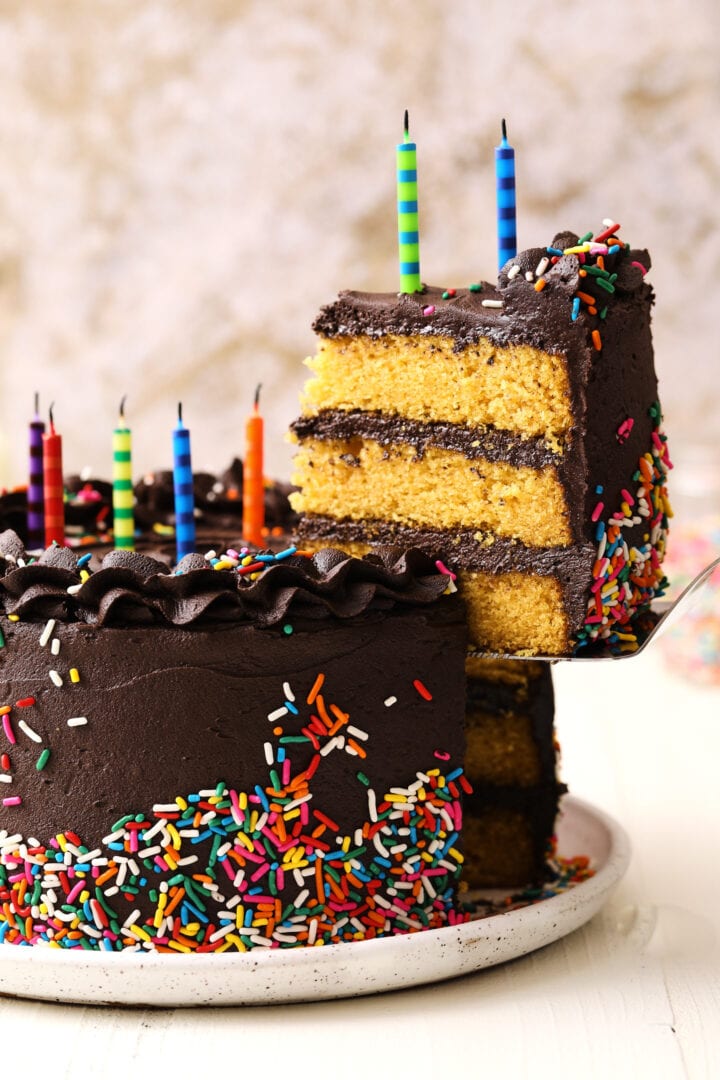
Speaking of frosting, this yellow birthday cake isn’t complete until it’s stacked up with a couple layers of rich, fudgy dark chocolate buttercream. The frosting recipe makes enough to use about 2/3 cup, or 150 grams, of frosting between layers and on top. The remaining frosting will be more than enough to perfectly cover the sides of the cake.
The recipe calls for both regular and black cocoa powder. The black stuff gives the frosting a deeper chocolate flavor and a darker color. If you can’t get any black cocoa, just use regular cocoa for the entire thing. No worries!
Decorate with a few sprinkles before serving along with some ice cream 🙂

Yellow Birthday Cake
- Prep Time: 30 minutes
- Cooling Time: 2-12 hours
- Cook Time: 23 minutes
- Total Time: 2 hours + 43 minutes (Can vary)
- Yield: 12 slices 1x
- Category: Dessert, Cake & Cheesecake
- Method: Oven
- Cuisine: American
Description
Buttery rich, tender cake layers and silky smooth chocolate buttercream are a match made in heaven. It’s a classic for a reason!
Ingredients
For the cake:
- 2 1/3 cup all purpose flour
- 1 1/2 baking soda
- 1/2 tsp baking powder
- 1 tsp salt
- 1/2 cup unsalted butter, room temperature
- 1 cup granulated sugar
- 1/2 cup light brown sugar, packed
- 1/2 cup grapeseed oil (can also use vegetable or canola oil)
- 3 large eggs, room temperature
- 3 large egg yolks, room temperature
- 2 TB pure vanilla extract
- 1/4 tsp yellow gel food coloring (optional)
- 1 1/2 cups whole milk buttermilk, room temperature
For the chocolate buttercream:
- 1 cup unsalted butter, cool room temperature
- 4 cups powdered sugar, sifted
- 1/4 cup cocoa powder
- 1/4 cup black cocoa powder
- 1 tsp salt
- 2 tsp vanilla extract
- 1/4 cup heavy cream
Instructions
To make the cake:
- Preheat the oven to 350 degrees and grease three 8 inch cake pans. Line the bottoms of the pans with parchment paper and set aside.
- Sift the flour, baking soda, baking powder and salt together in a small bowl and whisk a few times to combine. Set aside.
- Add the butter to a large mixing bowl (I used a 6 quart size) and beat with a hand mixer on medium high speed until creamy, about one minute.
- Add the granulated sugar and brown sugar and beat on medium high for another minute. The butter and sugar won’t form a paste, it will look like very wet sand.
- Add the oil and beat for another minute, until the mixture lightens in color and is slightly fluffy.
- Add the eggs and yolks, one at a time, beating well after adding each one.
- Add the vanilla extract and yellow food coloring and mix just until blended.
- Add half of the buttermilk and half of the flour mixture and mix on low speed JUST until there are only a few flour streaks remaining. Add the remaining buttermilk and flour and mix again on low speed. Fold the last few pockets of flour into the batter with a spatula. Do not overmix the batter.
- Divide the batter evenly among the three prepared cake pans, and smooth the surface with a butter knife or small offset spatula.
- Bake the cakes for 21-23 minutes, rotating the pans halfway through if your oven has hot spots. The cakes should spring back just barely if you gently press the center with your finger.
- Remove the cakes from the oven and allow them to cool for 5-6 minutes. The pans will still be too hot to handle with bare hands, so carefully invert each cake layer onto a sheet of plastic wrap and wrap each layer securely, being sure to seal the edges/sides.
- Load the cakes into the freezer and allow them to chill for 2 hours, or until they are fully cold and the edges are beginning to freeze. At this point, if you’re serving the cake the next day, keep the layers wrapped and in the fridge until you’re ready to use them.
To make the buttercream and finish the cake:
- Add the butter to the bowl of a stand mixer and use the paddle attachment on medium high speed to beat until smooth and creamy, about a minute. Scrape down the bowl and add the remaining ingredients.
- Mix on low speed until the powdered sugar and cocoa have mostly been incorporated. Increase the speed to medium high again and beat for 2-3 minutes, until the frosting is smooth, lighter in color and fluffy.
- Unwrap the first cake layer and use a serrated knife to carefully level off the top of the cake. You may not need to do this if your cakes flattened out after being removed from the oven.
- Add the leveled cake layer to a large plate or decorating turntable (preferred). Add about 2/3 cup of the chocolate buttercream to the top of the cake and use an offset spatula to cover the top in a smooth, even layer.
- Repeat the process with the second and third cake layers, stacking them on top of each other with the buttercream in between. Use the remaining chocolate frosting to cover the sides of the cake. You can smooth the outside of the cake with a bench or cake scraper.
- Decorate the cake with sprinkles, if desired, and serve! Makes 8 large slices, and up to 12 medium/small slices.


Nutrition
- Serving Size: 1 slice
- Calories: 695
- Sugar: 65.8 g
- Sodium: 605.6 mg
- Fat: 37 g
- Saturated Fat: 17.5 g
- Trans Fat: 0 g
- Carbohydrates: 87.6 g
- Fiber: 1.7 g
- Protein: 6.7 g
- Cholesterol: 159.8 mg


What does Matthew know he has no taste. It’s red velvet all the way. Thank you for your concern